Table of Contents
This homemade ciabatta bread recipe brings the rustic charm of an Italian bakery straight to your kitchen. The loaf is characterized by its irregular shape, dusted flour top, and that signature “slipper” appearance which gives the bread its name. It offers a sensory delight with a satisfying crunch from the golden crust, followed immediately by a chewy, moist, and airy interior that is full of flavor. Whether you are an experienced baker or trying your hand at artisan bread for the first time, this recipe simplifies the process without compromising on the authentic taste and texture that makes ciabatta a global favorite.
Quick Facts / Recipe Snapshot
This recipe yields two beautiful loaves or about eight large rolls, making it perfect for meal prepping or a family dinner. The total time commitment is approximately 4 to 18 hours, depending on your chosen fermentation method, though active hands-on time is surprisingly minimal, around 30 minutes. It is rated as a moderate difficulty recipe due to the hydration level, but is made accessible with our specific techniques. The cost is incredibly low, utilizing pantry staples like flour and yeast. This bread is naturally vegan, dairy-free, and can be adapted for various dietary needs, serving as a versatile canvas for many meals.
What Is Ciabatta Bread?
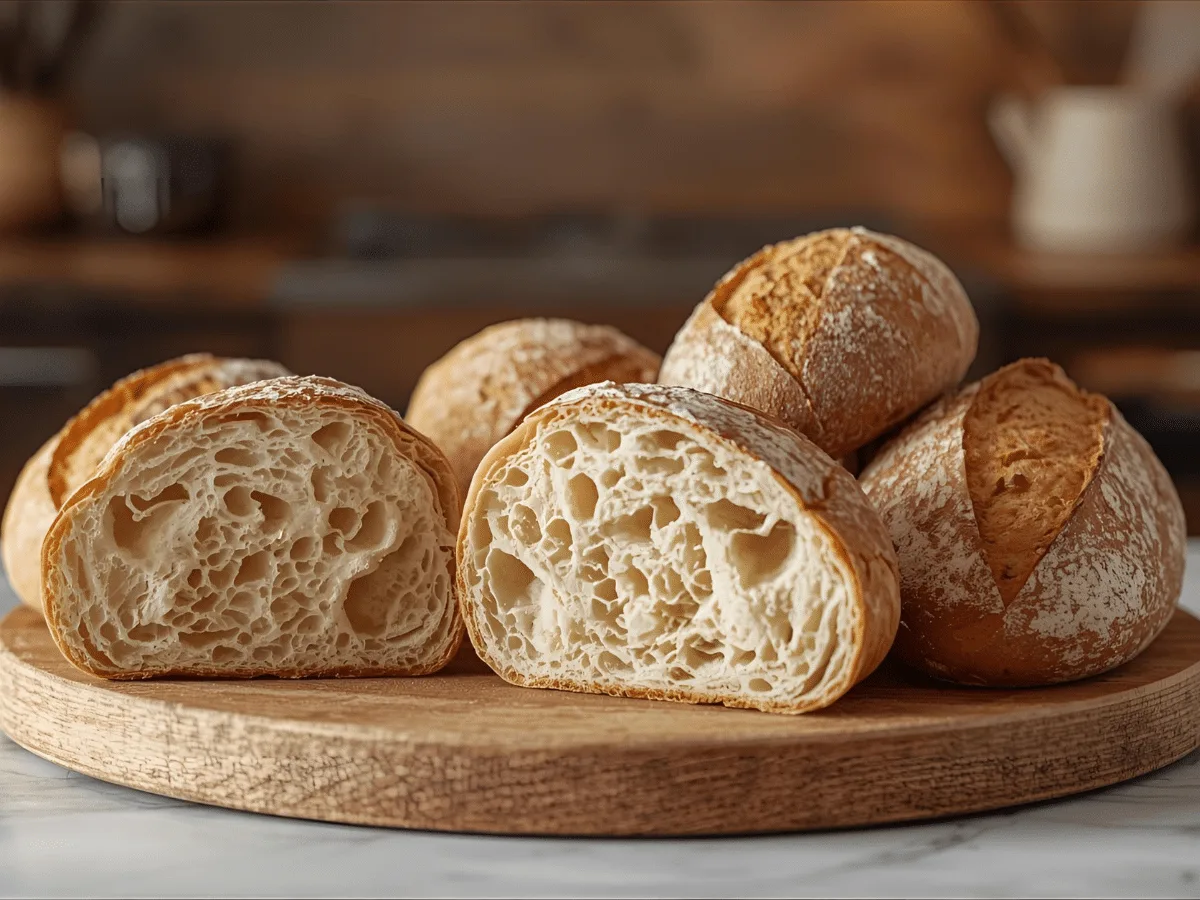
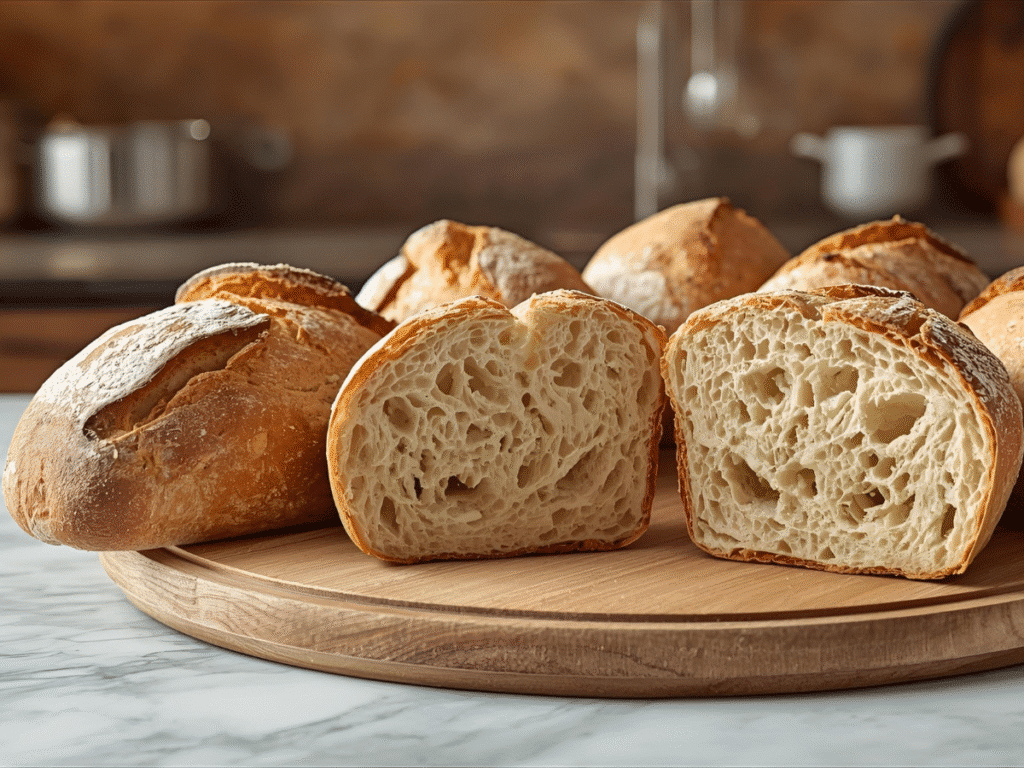
Ciabatta bread is a classic Italian white bread known for its high hydration levels, which creates a very wet and sticky dough during preparation. This moisture is the secret behind its magnificent open crumb structure, featuring large, irregular holes that are perfect for catching olive oil or soup. Unlike dense sandwich loaves, ciabatta has a chewy texture and a distinctively crisp, floury crust. It is the quintessential artisan loaf, often baked on a stone or steel to maximize oven spring, resulting in a bread that is light, airy, and robust enough to hold generous sandwich fillings without becoming soggy.
Origins & Inspiration
While it feels like an ancient tradition, ciabatta was actually developed in the 1980s in Adria, Italy, by a baker named Arnaldo Cavallari. It was created as an Italian response to the growing popularity of French baguettes, reclaiming the sandwich market with a bread that utilized local ingredients and olive oil. Our version honors this modern classic by maintaining the traditional reliance on a “biga” or long fermentation process to develop deep flavor, while adapting the technique for the modern home oven. It represents a bridge between professional Italian baking and the comfort of homemade food, celebrating the simple joy of flour, water, salt, and yeast.
Why You’ll Love This Recipe
You will fall in love with this recipe because it delivers bakery-quality results with standard kitchen equipment. The texture is the true star here; the contrast between the shattering crisp crust and the pillow-soft interior is addictive. It is incredibly versatile, shining just as brightly as a side for a hearty stew as it does as the foundation for a gourmet panini. Furthermore, the satisfaction of pulling a golden, professional-looking loaf out of your own oven is unmatched, providing a sense of accomplishment and a wonderful aroma that fills your entire home.
Ingrédients & Notes
- 500g Bread Flour: High protein content is crucial for structure; can substitute with high-quality all-purpose flour if necessary.
- 400g Warm Water: Lukewarm (approx 95°F); hydration is key for the airy holes.
- 2 tsp Instant Yeast: Provides the rise; active dry yeast can be used, but needs activation in water first.
- 10g Sea Salt: Essential for flavor and controlling fermentation; fine-grain dissolves best.
- 2 tbsp Extra Virgin Olive Oil: Adds flavor and helps with dough handling; distinct from the water content.
- Semolina Flour (Optional): For dusting the baking sheet to prevent sticking and add crunch.
Step-by-Step Instructions
- Begin by mixing the flour, salt, and instant yeast in a large bowl to ensure even distribution of the dry ingredients.
- Add the warm water and olive oil, then mix with a sturdy spatula or Danish dough whisk until a shaggy, wet sticky dough forms and no dry flour remains.
- Cover the bowl with plastic wrap or a damp towel and let it rest for 30 minutes to allow the flour to hydrate fully (autolyse).
- Perform a series of “stretch and folds” by wetting your hands, grabbing one side of the dough, lifting it up, and folding it over the center; rotate the bowl and repeat for all four sides.
- Cover and let rest for 30 minutes, then repeat the stretch and fold process three more times to build gluten structure without kneading.
- Allow the dough to bulk ferment at room temperature for 2 to 3 hours, or until it has tripled in volume and is bubbly and jiggly.
- Generously flour your work surface and carefully turn the dough out, handling it gently to preserve the air bubbles.
- Divide the dough into two equal rectangular pieces using a bench scraper, then gently shape them into long loaves or “slippers” by tucking the edges underneath.
- Place the shaped loaves on a parchment-lined baking sheet dusted with semolina or flour, cover with a floured cloth, and proof for 45 minutes.
- Preheat your oven to 450°F (230°C) and place a pan of water on the bottom rack to create steam.
- Bake the loaves for 20-25 minutes until they are deep golden brown and sound hollow when tapped on the bottom.
- Cool completely on a wire rack before slicing to allow the crumb structure to set perfectly.
Tips for Perfect Ciabatta Bread Every Time
Hydration is the most critical factor in this recipe, so resist the urge to add more flour during the mixing stage, even if the dough looks impossibly sticky. Using a kitchen scale for measurements is highly recommended, as volume measurements can be inconsistent and affect the delicate water-to-flour ratio. Steam is your best friend for achieving that professional crust; the moisture keeps the surface soft initially, allowing the bread to spring up fully before hardening into a crispy shell. Always let the bread cool fully before cutting, as slicing it while hot will compress the crumb and turn the texture gummy rather than airy.
Variations, Swaps & Add-Ins
For a Mediterranean twist, gently fold in pitted kalamata olives and fresh rosemary during the last stretch and fold set. Roasted garlic cloves or sun-dried tomatoes can also be added to infuse the bread with savory richness, perfect for dipping in oil. If you prefer a nuttier flavor and denser texture, you can substitute up to 20% of the white bread flour with whole wheat or rye flour. For a cheesy version, chunks of Parmesan or Asiago cheese can be incorporated, creating pockets of melted delight that pair beautifully with wine or pasta dishes.
Ingredient Spotlight
Bread flour is the backbone of this recipe, specifically chosen for its high protein content, which ranges between 12% and 14%. This protein creates strong gluten strands that are capable of trapping the carbon dioxide produced by the yeast, which is essential for supporting the large air pockets characteristic of ciabatta. Unlike standard all-purpose flour, bread flour provides the elasticity needed for the dough to stretch without tearing during the rising process. Understanding the role of your flour ensures you can consistently achieve that chewy, substantial texture that distinguishes artisan bread from soft commercial loaves.
Serving Suggestions (Presentation & Plating)
Serve the ciabatta loaf whole on a rustic wooden cutting board with a serrated knife, allowing guests to tear or slice their own pieces for a communal feel. A small bowl of high-quality extra virgin olive oil mixed with balsamic vinegar and cracked black pepper makes for an elegant and simple accompaniment. For a more formal presentation, slice the bread on a bias and toast it lightly, arranging it in a linen-lined basket alongside your main course. The rustic, flour-dusted top creates a beautiful visual contrast against colorful salads or deep red pasta sauces.
Best Sides to Serve With Ciabatta Bread
This bread is the ultimate companion for soups, particularly creamy tomato basil or hearty vegetable minestrone, where it can soak up the broth. It pairs exceptionally well with charcuterie boards featuring cured meats, soft cheeses, and pickled vegetables. Fresh salads with vinaigrette dressings are elevated by a side of warm ciabatta, adding a satisfying crunch and carbohydrate balance to the meal. It also serves as an excellent base for bruschetta, topped with fresh diced tomatoes, basil, and garlic for a classic Italian appetizer.
Flavor Pairing & Beverage Match
The neutral yet yeasty flavor of ciabatta pairs wonderfully with medium-bodied red wines like Chianti or Sangiovese, which complement the bread’s Italian heritage. For beer lovers, a crisp pilsner or a light lager cuts through the richness of olive oil dips and cleanses the palate. If serving with a cheese course, a dry white wine such as Pinot Grigio highlights the nutty notes of the crust. Non-alcoholic options include sparkling water with a twist of lemon or an Italian soda, providing a refreshing counterpoint to the chewy, hearty texture of the bread.
Make-Ahead & Storage Guide
You can prepare the dough up to the bulk fermentation stage and place it in the refrigerator for up to 24 hours to develop even more complex flavors before shaping and baking. Baked loaves should be stored in a paper bag or a bread box at room temperature for up to two days to maintain the crust’s crispness; plastic bags will soften the crust. For longer storage, slice the cooled bread and freeze it in airtight bags for up to three months. Reheat frozen slices directly in the toaster or oven to revive the fresh-baked taste and texture instantly.

Budget & Pantry Strategy
Ciabatta is one of the most economical recipes you can make, relying on bulk ingredients that cost pennies per serving compared to store-bought artisan loaves. Buying yeast in jars rather than individual packets significantly lowers the long-term cost of baking bread at home. You can utilize leftover whey from yogurt making as a substitute for water to add protein and a subtle tang without spending extra money. To minimize waste, stale ciabatta is the absolute best candidate for making homemade croutons or savory bread puddings, ensuring every crumb is put to delicious use.
Scaling for a Crowd
This recipe can easily be doubled to produce four loaves, which is ideal for large gatherings or holiday dinners. When scaling up, ensure your mixing bowl is large enough to accommodate the expanding dough, or use two separate bowls to manage the volume. You may need to bake the loaves in batches if your oven cannot hold two baking sheets simultaneously without overcrowding. If baking in batches, keep the second batch of shaped dough in the refrigerator to slow down the final proof so it doesn’t over-rise while the first batch cooks.
Weeknight Workflow Planner
Start the process the evening before by mixing the dough and letting it do a slow fermentation in the fridge overnight while you sleep. The next day, remove the dough from the refrigerator about two hours before you plan to bake, allowing it to come to room temperature and finish rising. This method shifts the passive waiting time to the night and workday, leaving only the shaping and baking for the evening. You can have fresh, warm bread ready for a late dinner with less than 45 minutes of active effort spread over 24 hours.
Kids & Family Friendly Adaptations
Children often love the process of baking, and this recipe offers a fun sensory experience with the “squishy” dough and flour dusting. You can shape the dough into smaller, individual rolls instead of large loaves, which are perfect for kid-sized sandwiches or lunchbox additions. For picky eaters, reducing the amount of flour on the crust or brushing it with a little butter immediately after baking can make the crust softer and more familiar. Serving the bread with a favorite dip, like mild marinara or cheese sauce, encourages kids to try and enjoy homemade artisan bread.
Troubleshooting & Fixes
If your loaf turns out flat or dense, it is likely due to under-proofing or knocking too much air out during the shaping process. Ensure you handle the dough with extreme gentleness, treating it like a delicate balloon that you don’t want to pop. A crust that is too soft usually indicates a lack of steam in the oven or insufficient baking time; try baking directly on a pizza stone if available. If the dough spreads uncontrollably on the baking sheet, the gluten structure may not be developed enough, so add an extra set of stretch and folds next time.
Cultural or Seasonal Context
In Italy, bread is not just food; it is a symbol of hospitality and community, often broken by hand rather than cut with a knife. Ciabatta, meaning “slipper,” reflects the casual, rustic nature of Italian country life, where imperfection is celebrated as authentic character. This bread is particularly popular during summer months for light meals of tomatoes and mozzarella, but it transitions seamlessly into winter as a hearty dipper for soups. Baking this bread connects you to a global tradition of artisan craftsmanship that values time and patience over industrial speed.
FAQs
- Can I use all-purpose flour instead of bread flour? Yes, but the loaf may be slightly flatter and less chewy due to lower protein content; bread flour is superior for structure.
- Why is my dough so sticky and hard to handle? High hydration is normal for ciabatta; wet your hands or use oil to handle it, and do not add excessive flour or the bread will be dense.
- How do I know when the bread is fully baked? The loaf should be a deep golden brown and sound hollow when you tap the bottom; an internal temperature of 200°F (93°C) is accurate.
- Can I bake this without a stand mixer? Absolutely, the stretch and fold method described in the instructions is designed specifically for hand-mixing and works perfectly.
Love this recipe? Discover even more!
Explore my Pinterest boards for a world of delicious recipes, fresh ideas, and inspiring flavors. Click here and start pinning your next favorite dish! ➜https://www.pinterest.com/ElitesRecipes/
Print
A rustic, airy Italian ciabatta bread with a crispy golden crust and soft, chewy interior. Perfect for sandwiches and dipping in olive oil.
- Prep Time: 30 minutes
- Cook Time: 25 minutes
- Total Time: 4 hours
- Yield: 2 loaves
- Category: Bread
- Method: Baking
- Cuisine: Italian
- Diet: Vegan
Ingredients
500g bread flour
400g warm water (lukewarm)
2 tsp instant yeast
10g sea salt
2 tbsp extra virgin olive oil
Semolina flour (for dusting)
Instructions
1. Mix flour, salt, and yeast in a large bowl.
2. Add warm water and olive oil; mix until a sticky dough forms.
3. Cover and let rest for 30 minutes (autolyse).
4. Perform stretch and folds: lift dough side, fold over, rotate bowl. Repeat 4 sides.
5. Rest 30 minutes. Repeat stretch/fold cycle 3 more times.
6. Cover and bulk ferment for 2-3 hours until tripled.
7. Turn dough onto floured surface gently.
8. Divide into two loaves and shape into rectangles.
9. Proof on parchment for 45 minutes.
10. Preheat oven to 450°F (230°C) with a steam pan.
11. Bake for 20-25 minutes until golden brown.
12. Cool completely on a wire rack.
Notes
Weigh ingredients for best results.
Do not slice while hot.
Store in a paper bag for up to 2 days.