Table of Contents
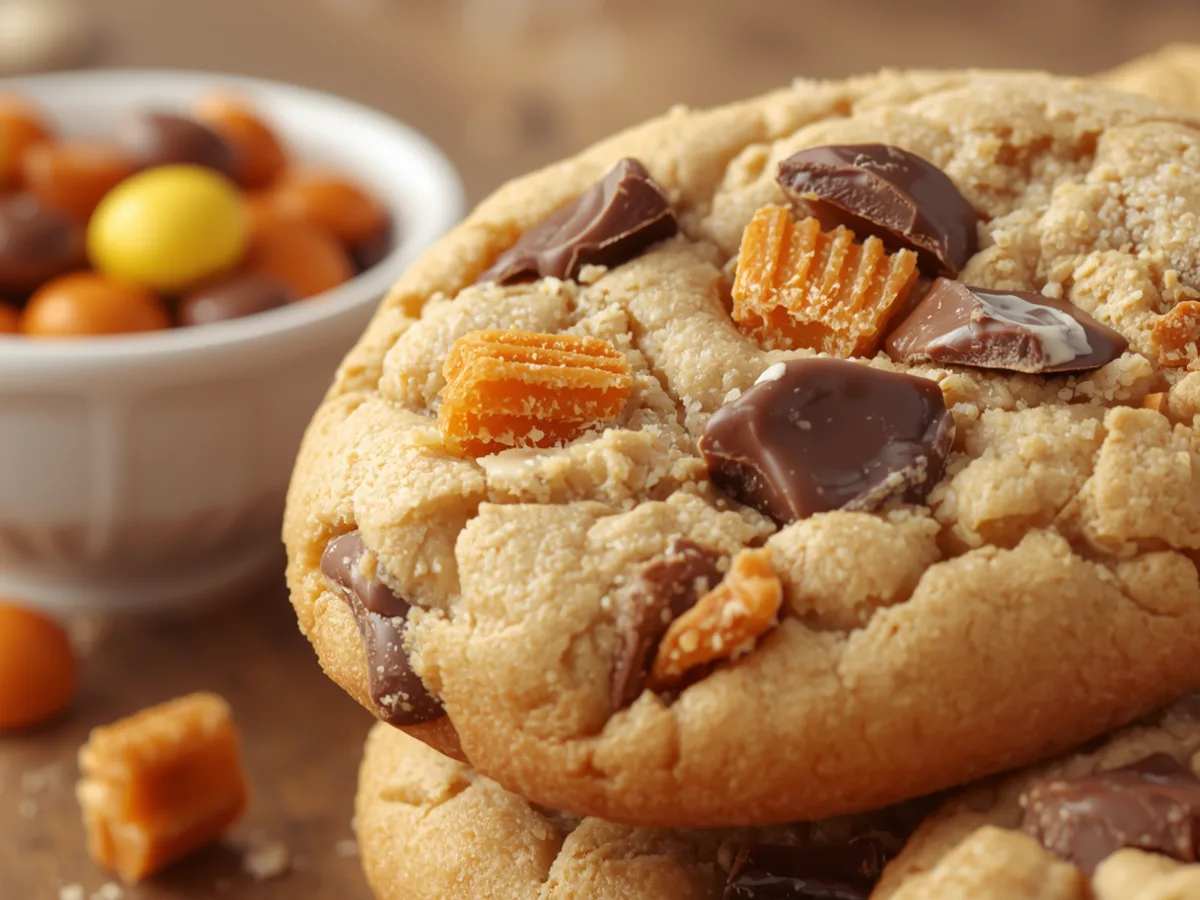
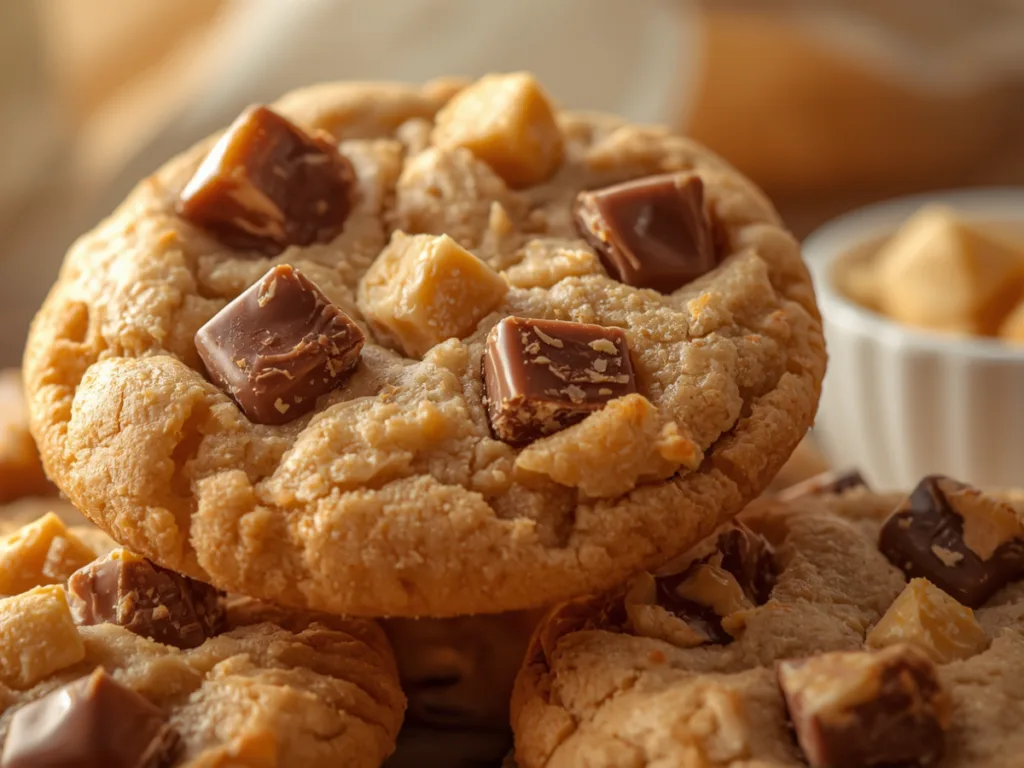
The Peanut Butter Butterfinger Cookies represent a pinnacle of American confectionery, blending the nostalgic crunch of a classic candy bar with the comforting, melt-in-your-mouth richness of a traditional peanut butter base. Imagine a cookie that offers a dual-textural experience: the outer edges provide a delicate snap, while the center remains incredibly soft and tender. The addition of crushed candy bits ensures that shards of toasted peanut toffee and smooth chocolate coating punctuate every bite. This recipe is designed to evoke the warmth of a home kitchen while delivering results that look like they belong in a high-end bakery. Whether you are preparing these for a family gathering or a quiet evening snack, their irresistible aroma will fill your home with sweetness.
Quick Facts / Recipe Snapshot
- Prep Time: 15 minutes
- Cook Time: 10 minutes
- Total Time: 25 minutes
- Yield: 24 cookies
- Difficulty: Easy
- Estimated Cost: $8 – $12
- Dietary Note: Vegetarian, contains peanuts and dairy.
What Is a Peanut Butter Butterfinger Cookie?
A Peanut Butter Butterfinger Cookie is essentially a gourmet upgrade to the standard peanut butter treat. Unlike plain cookies, this version incorporates generous amounts of chopped Butterfinger candy, creating a “honeycombed” texture in the dough. The base is crafted using Creamy Peanut Butter to ensure a uniform flavor profile, while the candy adds a distinct “crispety, crunchety” element that is synonymous with the brand. These are often referred to as Jumbo Peanut Butter Cookies when scooped in larger portions, making them a substantial and satisfying dessert for any enthusiast of the classic candy-and-cookie combination.
Origins & Inspiration
The inspiration for these Peanut Butter Butterfinger Cookies stems from the modern American tradition of repurposing seasonal candies into baked goods. While the peanut butter cookie itself dates back to the early 20th century, the trend of adding candy bars gained massive popularity in the late 1990s and early 2000s. This specific version draws from the “Crumbl-style” movement, where cookies are made thicker and more decadent. By combining the salty-sweet profile of peanut butter with the specific toffee-like notes of Butterfinger, this recipe pays homage to classic American pantry staples while elevating them through modern baking techniques.
Why You’ll Love This Recipe
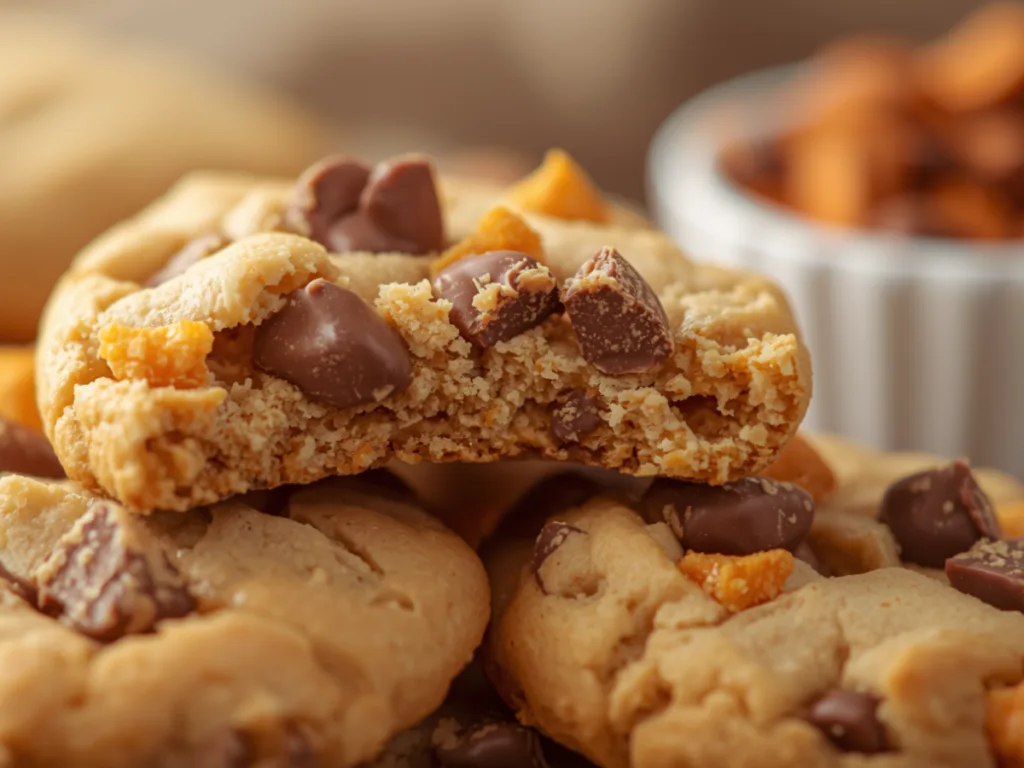
You will absolutely fall in love with the sensory balance of these Peanut Butter Butterfinger Cookies. The flavor profile is a sophisticated interplay of salt and sugar, where the natural oils of the Peanut Butter enhance the richness of the Butter Cream base. From a texture perspective, the cookies avoid the dryness often associated with peanut butter recipes, thanks to a carefully calibrated ratio of brown sugar to flour. Furthermore, the simplicity of the process means you don’t need professional equipment to achieve spectacular results; a simple hand mixer and a Rimmed Baking Sheet are all it takes to produce professional-grade Gooey Cookies.
Ingredients & Notes
- 1 cup Butter (Unsalted): Soften Butter at room temperature to ensure a light and fluffy creamed base.
- 1 cup Creamy Peanut Butter: Standard brands like Jif or Skippy work best; avoid natural styles as they may separate.
- 1 cup Brown Sugar (Packed): Provides moisture and a deep molasses flavor for Chewy Butterfinger Cookies.
- 1/2 cup Granulated Sugar: Helps achieve those slightly crisp, golden edges.
- 2 Large Eggs: Acts as the primary binding agent for the dough structure.
- 1 tsp Vanilla Extract: Enhances the depth of both the peanut and chocolate notes.
- 2 1/2 cups All-Purpose Flour: Provides the necessary structure for Soft Peanut Butter Cookies.
- 1 tsp Baking Soda: Essential for the proper rise and browning of the cookies.
- 1/2 tsp Salt: Balances the sweetness and amplifies the peanut flavor.
- 2 cups Butterfinger Candy (Chopped): The star ingredient that provides the signature crunch.
Step-by-Step Instructions
- Preparation: Preheat your oven to 350°F (175°C). Line a Rimmed Baking Sheet with parchment paper or a silicone baking mat to prevent sticking and ensure even heat distribution.
- Creaming the Base: In a large mixing bowl, combine the softened butter, Creamy Peanut Butter, brown sugar, and granulated sugar. Using an electric mixer, beat the mixture on medium-high speed for about 3 minutes until the texture is pale and airy.
- Adding Wet Ingredients: Incorporate the eggs one at a time, beating well after each addition. Mix in the vanilla extract until fully combined.
- Mixing Dry Ingredients: In a separate medium bowl, whisk together the flour, baking soda, and salt.
- Combining: Gradually add the dry flour mixture to the wet peanut butter mixture. Mix on low speed just until the flour streaks disappear; be careful not to overwork the gluten.
- Folding in Candy: Gently fold in the chopped Butterfinger Candy using a spatula. Reserve a few bits to press into the tops of the cookies later.
- Scooping: Use a cookie scoop to form balls of dough (approximately 2 tablespoons each). Place them on the prepared Rimmed Baking Sheet, spaced 2 inches apart.
- Baking: Bake for 10 to 12 minutes. The edges should be set and lightly golden, but the centers should still look slightly soft.
- Cooling: Allow the Peanut Butter Butterfinger Cookies to rest on the sheet for 5 minutes before transferring them to a wire cooling rack.
Tips for Perfect Peanut Butter Butterfinger Cookies
To achieve the best results with your Peanut Butter Butterfinger Cookies, always ensure your ingredients are at room temperature before you begin. Cold butter or eggs can cause the dough to break or result in an uneven bake. When measuring your flour, use the “spoon and level” method rather than scooping directly from the bag to avoid packing the flour, which leads to dry, crumbly cookies. Additionally, keep an eye on the oven; these cookies are best when slightly underbaked, as they will continue to firm up on the hot baking sheet once removed from the oven.
Variations, Swaps & Add-Ins
While the classic Peanut Butter Butterfinger Cookies are perfect as is, you can easily customize them to suit your preferences. For a double chocolate twist, add a half cup of semi-sweet chocolate chips along with the candy bits. If you prefer a nuttier texture, swap half of the Creamy Peanut Butter for a chunky variety. For those following a gluten-free diet, a high-quality 1-to-1 gluten-free flour blend can be used with excellent results. You might also consider using Oatmeal Peanut-butterfinger Cookies techniques by adding a half cup of quick oats for extra heartiness.
Ingredient Spotlight: Butterfinger Candy
The defining characteristic of the Peanut Butter Butterfinger Cookies is, of course, the Butterfinger Candy. This unique confection is made through a process of aerating peanut butter and sugar to create a brittle, flaky texture that is then coated in a cocoa-based layer. In baking, these bits do not completely melt; instead, they soften slightly while retaining a distinct crunch. This provides a “flavor pop” that distinguishes this recipe from standard chocolate chip varieties. From a culinary perspective, the candy adds both a textural contrast and a concentrated peanut-toffee flavor that infuses the entire cookie.
Serving Suggestions (Presentation & Plating)
When serving Peanut Butter Butterfinger Cookies, presentation can elevate the experience from a simple snack to a gourmet dessert. Arrange the cookies on a wooden board or a ceramic platter, perhaps dusting them lightly with a pinch of flaky sea salt to highlight the peanut flavor. For a more indulgent display, serve them alongside a small bowl of extra Butterfinger Crumble Cookies bits for guests to sprinkle on top. If you are gifting these, stack them in a clear glass jar tied with a twine ribbon for a rustic, artisanal look that showcases the beautiful golden texture.
Best Sides to Serve With Cookies
A glass of cold milk is the quintessential companion for Peanut Butter Butterfinger Cookies, as the dairy helps cleanse the palate between rich, peanut-heavy bites. For a more sophisticated pairing, consider serving these alongside a bowl of fresh sliced apples or pears; the tartness of the fruit provides a refreshing counterpoint to the sweet candy and salty peanut butter. If you are hosting a dessert party, these cookies also pair wonderfully with a simple vanilla bean panna cotta or a light whipped cream dip infused with a touch of honey.
Flavor Pairing & Beverage Match
The robust profile of Peanut Butter Butterfinger Cookies requires beverages that can stand up to their intensity. A dark roast coffee or an espresso is an excellent choice, as the bitterness of the coffee beans complements the sweetness of the Butterfinger Candy. For tea lovers, a strong black tea like English Breakfast or a nutty Oolong provides a harmonious balance. If you’re looking for something unique, a glass of almond milk or an oat milk latte further emphasizes the nutty undertones of the Peanut Butter without being overly heavy.
Make-Ahead & Storage Guide
You can easily prepare the dough for Peanut Butter Butterfinger Cookies up to 48 hours in advance. Simply wrap the dough tightly in plastic wrap and store it in the refrigerator; this actually allows the flavors to meld and improves the final texture. Once baked, store the cookies in an airtight container at room temperature for up to 5 days. For longer storage, these cookies freeze beautifully for up to 3 months. When ready to eat, simply thaw at room temperature or warm them in the microwave for 10 seconds to recapture that “just-baked” gooeyness.
Budget & Pantry Strategy
Creating Peanut Butter Butterfinger Cookies is a cost-effective way to enjoy a gourmet dessert using mostly pantry staples. To save money, buy store-brand flour, sugar, and baking soda, as the quality difference is negligible in cookie recipes. Keep an eye out for sales on Butterfinger Candy after the holidays, which is a great time to stock up for your baking needs. By managing your pantry effectively and keeping Creamy Peanut Butter on hand, you can whip up a batch of these cookies whenever a craving strikes without needing a special trip to the grocery store.
Scaling for a Crowd
If you need to make Peanut Butter Butterfinger Cookies for a large event or a school bake sale, the recipe can be easily doubled or tripled. When working with larger quantities of dough, it is helpful to use a stand mixer to ensure even distribution of the ingredients. Bake multiple sheets at once, but remember to rotate the Rimmed Baking Sheet halfway through the cooking time to ensure every cookie browns evenly, regardless of its position in the oven. For very large crowds, you can make the cookies slightly smaller to increase the total yield per batch.
Weeknight Workflow Planner
Even on a busy weeknight, you can enjoy fresh Peanut Butter Butterfinger Cookies by utilizing a few time-saving strategies. Prepare the dry ingredients in a jar during the weekend, so you only need to add the wet components when you’re ready to bake. Alternatively, scoop the dough into balls and freeze them on a tray; once solid, transfer the balls to a freezer bag. This allows you to bake just two or three cookies at a time directly from the freezer, adding only 2 minutes to the standard baking time, providing a quick and easy homemade treat.
Kids & Family Friendly Adaptations
Peanut Butter Butterfinger Cookies are a guaranteed hit with children, but you can make the process even more fun by involving them in the preparation. Let kids help with unwrapping the candy bars or using a rolling pin to crush the Butterfinger Candy inside a sealed bag. For a fun variation, you can let them press a few extra candy bits into the dough balls before they go into the oven. If you have younger children, consider making “mini” versions of the cookies using a teaspoon, which are easier for small hands to manage and perfect for lunchboxes.
Troubleshooting & Fixes
If your Peanut Butter Butterfinger Cookies are spreading too much, it is often a sign that the butter was too soft or the oven wasn’t properly preheated. Try chilling the dough for 30 minutes before baking to help the fats solidify. On the other hand, if your cookies are too thick or cakey, you may have added too much flour; ensure you are using the correct measuring technique. If the bottoms are burning before the centers are cooked, move your oven rack to a higher position or use a double layer of parchment paper on your Rimmed Baking Sheet.
Cultural or Seasonal Context
While these cookies are enjoyed year-round, Peanut Butter Butterfinger Cookies are particularly popular during the autumn months and the post-Halloween season. In American culture, they represent a creative way to use leftover candy, turning a simple treat into a shared family experience. They are also a frequent favorite for “Cookie Swaps” and neighborhood gatherings, where their unique texture and recognizable flavor make them a standout entry. This recipe celebrates the American love for bold, sweet, and salty combinations that bring people together over a shared love of baking.
FAQs
Can I use natural peanut butter for these cookies? It is not recommended to use natural peanut butter for Peanut Butter Butterfinger Cookies as the lack of stabilizers can cause the cookies to become oily or crumble too easily. Stick to conventional creamy brands for the best texture.
How do I keep my cookies soft for days? The secret to keeping Soft Peanut Butter Cookies tender is to add a slice of white bread to the airtight container. The cookies will absorb the moisture from the bread, preventing them from drying out.
Can I make these without an electric mixer? Yes, you can mix Peanut Butter Butterfinger Cookies by hand using a sturdy wooden spoon, though it will require significant effort to cream the butter and sugars until they are sufficiently light and fluffy.
What is the best way to crush the Butterfinger bars? Place the candy bars in a large Ziploc bag and gently tap them with a rolling pin or the bottom of a heavy glass. You want a mix of fine crumbs and larger chunks for the best Gooey Cookies experience.
Love this recipe? Discover even more!
Explore my Pinterest boards for a world of delicious recipes, fresh ideas, and inspiring flavors. Click here and start pinning your next favorite dish! ➜https://www.pinterest.com/ElitesRecipes/
PrintEasy Peanut Butter Butterfinger Cookies
These soft and chewy cookies are packed with creamy peanut butter and crunchy Butterfinger candy bits for the ultimate treat.
- Prep Time: 15 minutes
- Cook Time: 10 minutes
- Total Time: 25 minutes
- Yield: 24 cookies
- Category: Dessert
- Method: Baking
- Cuisine: American
- Diet: Vegetarian
Ingredients
1 cup unsalted butter, softened
1 cup creamy peanut butter
1 cup light brown sugar, packed
1/2 cup granulated sugar
2 large eggs
1 tsp vanilla extract
2 1/2 cups all-purpose flour
1 tsp baking soda
1/2 tsp salt
2 cups Butterfinger candy bars, chopped
Instructions
1. Preheat oven to 350°F and line a baking sheet.
2. Cream butter, peanut butter, and sugars until fluffy.
3. Mix in eggs and vanilla.
4. Whisk dry ingredients and combine with wet mixture.
5. Fold in chopped Butterfinger pieces.
6. Scoop 2-tbsp balls onto baking sheet.
7. Bake for 10-12 minutes until edges are golden.
8. Cool on pan for 5 minutes before moving to a rack.
Notes
Chill dough for 30 minutes for thicker cookies. Store in an airtight container for up to 5 days. Use conventional creamy peanut butter for best results.