Table of Contents
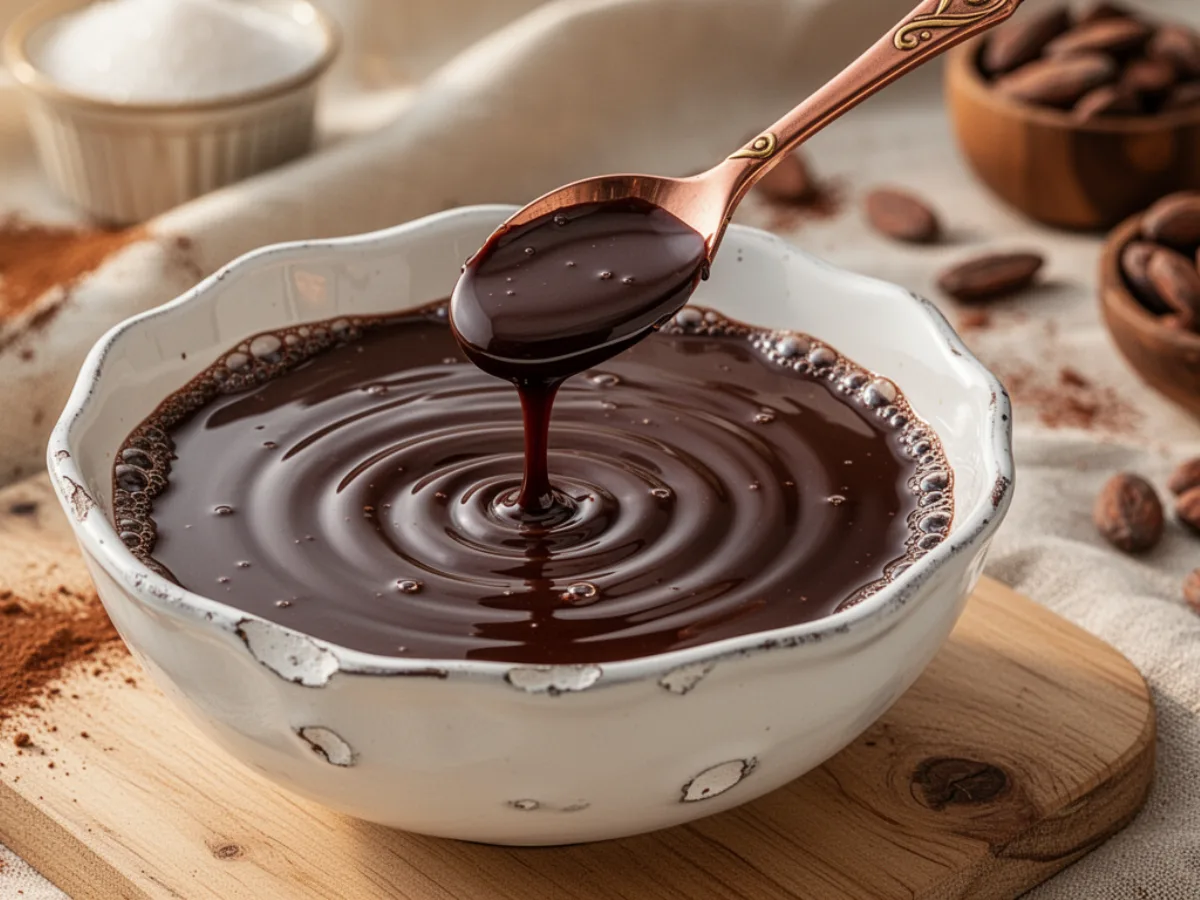
Imagine a kitchen filled with the deep aroma of premium cocoa as you whisk together a batch of rich homemade chocolate syrup. This recipe provides a velvety texture and an intense cocoa flavor that transforms any simple scoop of vanilla ice cream into a gourmet experience. It is the ultimate solution for those who want a high-quality dessert topping without the artificial additives found in commercial bottles.
Quick Facts / Recipe Snapshot
This quick preparation takes only 10 minutes from start to finish and yields approximately one and a half cups of homemade chocolate syrup. It is a beginner-friendly recipe that is naturally dairy-free and gluten-free, making it suitable for various dietary needs. The estimated cost is very low as it uses basic pantry staples that most home cooks already have in their cupboards.
What Is Homemade Chocolate Syrup?
This classic condiment is a liquid chocolate sauce made primarily from cocoa powder, sugar, and water, designed to be pourable even when cold. Unlike thick fudge sauce, homemade chocolate syrup remains fluid, making it ideal for mixing into cold milk or drizzling over fruit. It captures the essence of dark chocolate with a smooth finish that coats a spoon perfectly without being overly sticky.
Origins & Inspiration
While commercial versions gained popularity in the mid-20th century, the tradition of making a homemade chocolate syrup stems from American home-baking heritage. This specific version is inspired by the need for a cleaner, more robust flavor profile that mimics the nostalgic taste of childhood sundaes. Modern variations often focus on high-quality vanilla and sea salt to elevate the humble cocoa powder to professional standards.
Why You’ll Love This Recipe
You will absolutely adore how this homemade chocolate syrup delivers a professional-grade taste with minimal effort. The sensory experience is unmatched, offering a silky mouthfeel and a balanced sweetness that doesn’t overwhelm the palate. It provides the convenience of a quick fix while ensuring your family enjoys a treat made with recognizable, wholesome ingredients.
Ingrédients & Notes
- 1 cup Granulated Sugar: Provides the essential sweetness and structure for the syrup.
- 1/2 cup Unsweetened Cocoa Powder: Use high-quality Dutch-processed cocoa for a darker, richer profile.
- 1/2 cup Cold Water: The base liquid that dissolves the solids into a smooth consistency.
- 1/4 teaspoon Fine Sea Salt: A crucial element that enhances the chocolate notes and balances the sugar.
- 1 teaspoon Pure Vanilla Extract: Adds a warm, aromatic depth to the finished homemade chocolate syrup.
Step-by-Step Instructions
- In a small saucepan, whisk together the granulated sugar and cocoa powder until all lumps are completely gone.
- Gradually pour in the cold water and add the sea salt, whisking constantly until the mixture becomes a smooth paste.
- Place the saucepan over medium heat and bring the liquid to a gentle boil while stirring occasionally to prevent sticking.
- Allow the mixture to simmer for exactly 3 minutes, which helps the homemade chocolate syrup reach the perfect thickness.
- Remove the pan from the heat and immediately stir in the pure vanilla extract to preserve its delicate flavor.
- Let the syrup cool completely at room temperature before transferring it to a glass jar for storage in the refrigerator.
Tips for Perfect Homemade Chocolate Syrup Every Time
To ensure a glossy finish, never stop whisking during the initial heating phase to prevent the cocoa from scorching on the bottom. If you prefer a thinner consistency for your homemade chocolate syrup, you can reduce the simmering time by thirty seconds or add a tablespoon of water. Always use a clean, dry whisk to avoid introducing any moisture that could cause the sugar to crystallize later.
Variations, Swaps & Add-Ins
For a unique twist, you can substitute the water with strong brewed coffee to create a sophisticated mocha-flavored homemade chocolate syrup. If you are looking for a warmer flavor, consider adding a pinch of cinnamon or a drop of peppermint extract after the cooling process. Those preferring a less refined sweetener can experiment with maple syrup, though it will slightly alter the final viscosity.
Ingredient Spotlight
The unsweetened cocoa powder is the true star of this homemade chocolate syrup, providing antioxidants and a complex flavor profile. High-quality vanilla extract acts as a flavor bridge, connecting the bitterness of the cocoa with the sweetness of the sugar. Pure sea salt is the hidden hero, as it prevents the syrup from tasting flat and highlights the fruity notes of the chocolate.
Serving Suggestions (Presentation & Plating)
For a beautiful presentation, drizzle the homemade chocolate syrup in a zig-zag pattern over a tall glass of iced coffee. You can also create a professional “swirl” effect by pouring it along the inside walls of a glass before filling it with milk. When serving on a plate, a small pool of syrup under a slice of cheesecake adds a touch of elegance.
Best Sides to Serve With Chocolate Syrup
This versatile homemade chocolate syrup pairs wonderfully with a side of fresh strawberries or sliced bananas for a healthy yet indulgent snack. It also complements warm pound cake or airy meringues, providing a rich contrast to lighter textures. For a cozy breakfast, try serving it alongside fluffy pancakes or golden waffles topped with whipped cream.
Flavor Pairing & Beverage Match
Darker roasts of coffee are the perfect match for the deep cocoa notes found in this homemade chocolate syrup. It also pairs exceptionally well with nut-based milks, such as almond or hazelnut, which enhance the earthy undertones of the chocolate. If you are serving a dessert, a cold glass of whole milk provides the classic creamy balance needed for this treat.
Make-Ahead & Storage Guide
You can easily prepare this homemade chocolate syrup up to two weeks in advance and store it in an airtight glass container. It is important to keep it refrigerated, as the lack of preservatives means it needs a cold environment to stay fresh. If the syrup thickens too much in the fridge, simply let it sit at room temperature for ten minutes.
Budget & Pantry Strategy
Creating your own homemade chocolate syrup is significantly cheaper than purchasing premium store brands, saving you money on every bottle. By buying cocoa powder in bulk, you can reduce the cost per serving to just a few cents while maintaining superior quality. This strategy also ensures you always have a dessert topping ready without needing an extra trip to the store.
Scaling for a Crowd
When hosting a large party, you can easily double or triple this homemade chocolate syrup recipe by using a larger pot. Ensure that the simmering time remains consistent, as the volume of liquid will take longer to reach a boil but only needs three minutes of simmer. This makes it an excellent choice for ice cream sundae bars at birthdays or family reunions.
Weeknight Workflow Planner
For a stress-free weeknight, make the homemade chocolate syrup during your Sunday meal prep session, so it is ready for quick desserts. It takes less time than a commercial coffee run and provides a sense of accomplishment to have a homemade staple on hand. Having it ready in the fridge allows for instant chocolate milk after a long day of school or work.
Kids & Family Friendly Adaptations
Children will love being involved in the whisking process, making this homemade chocolate syrup a fun family activity. To make it more kid-friendly, you can serve it in a squeeze bottle, allowing them to create their own designs on their ice cream. It is a great way to control the sugar content in their snacks while still providing a beloved treat.
Troubleshooting & Fixes
If your homemade chocolate syrup turns out too thick, simply whisk in a teaspoon of warm water until the desired consistency is reached. Grittiness usually indicates that the sugar didn’t dissolve completely, which can be fixed by reheating the mixture over low heat for a minute. If the flavor is too intense, a tiny pinch more salt can help mellow the cocoa.
Cultural or Seasonal Context
In American culinary culture, homemade chocolate syrup is often associated with summer heatwaves and nostalgic ice cream trucks. During the winter holidays, it becomes a staple for making hot cocoa or gifting in decorative jars to neighbors and friends. It represents a simple joy that transcends seasons, bringing comfort and sweetness to any time of the year.
FAQs
Can I freeze this syrup? It is not recommended to freeze homemade chocolate syrup as the texture may become grainy upon thawing. Is this syrup vegan? Yes, this specific recipe is entirely vegan as long as you use standard granulated sugar and cocoa. How long does it last? It stays fresh in the refrigerator for about two to three weeks if kept in a sealed jar. Can I use honey? Honey can be used, but it will significantly change the flavor of the homemade chocolate syrup.
Love this recipe? Discover even more!
Explore my Pinterest boards for a world of delicious recipes, fresh ideas, and inspiring flavors. Click here and start pinning your next favorite dish! ➜https://www.pinterest.com/ElitesRecipes/
PrintMaster the Best Homemade Chocolate Syrup in 10 Minutes
A rich, glossy, and smooth homemade chocolate syrup that is better than store-bought and ready in just 10 minutes.
- Prep Time: 2 minutes
- Cook Time: 8 minutes
- Total Time: 10 minutes
- Yield: 1.5 cups
- Category: Dessert Topping
- Method: Stovetop
- Cuisine: American
- Diet: Vegan
Ingredients
1 cup granulated sugar
1/2 cup unsweetened cocoa powder
1/2 cup cold water
1/4 tsp sea salt
1 tsp pure vanilla extract
Instructions
1. Whisk sugar and cocoa in a saucepan.
2. Add water and salt; whisk until smooth.
3. Bring to a boil over medium heat.
4. Simmer for 3 minutes while stirring.
5. Remove from heat and stir in vanilla.
6. Cool completely and store in a jar.
Notes
Store in the refrigerator for up to 3 weeks.
If too thick, whisk in a teaspoon of warm water.
Perfect for milk, ice cream, or coffee.