Table of Contents
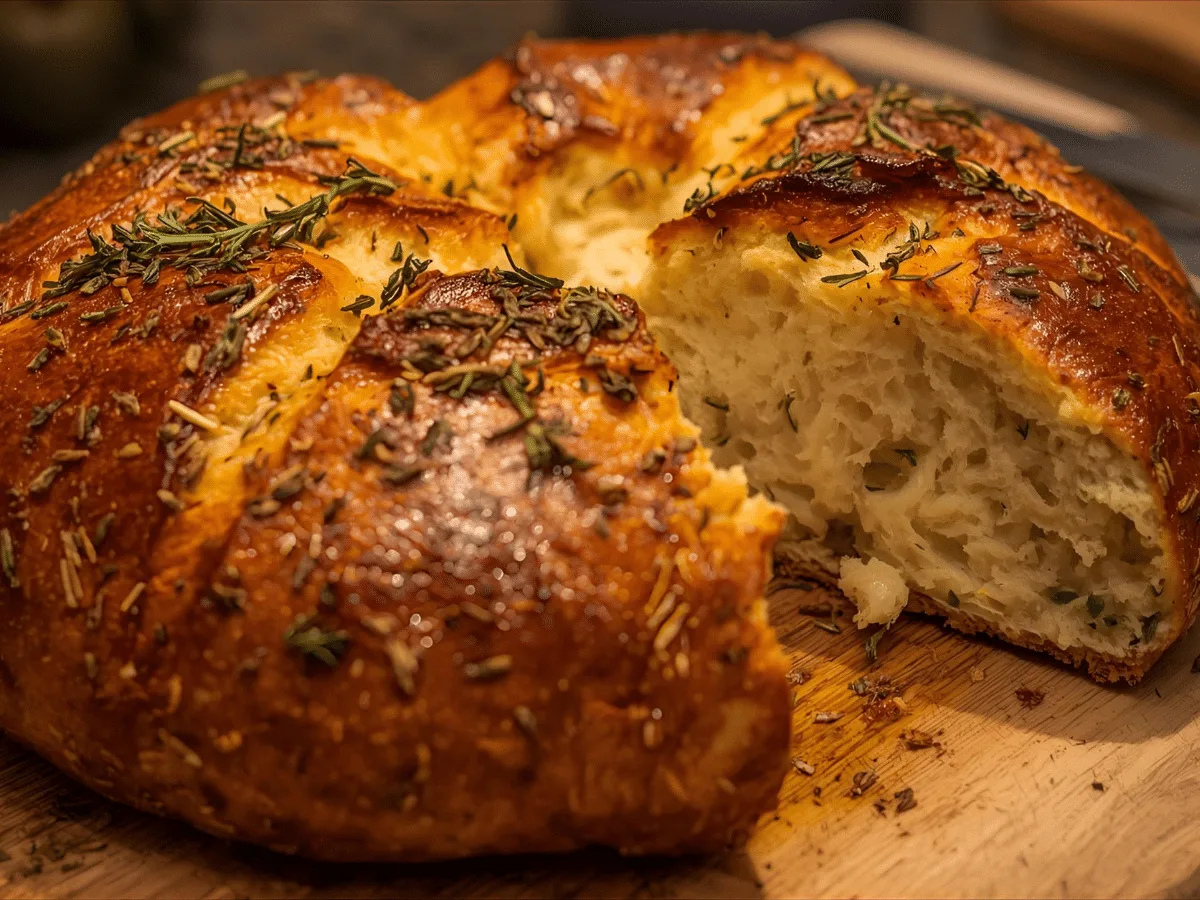
Imagine pulling a golden, crackling loaf from your oven, the aroma of roasted garlic and earthy rosemary filling your kitchen. This Dutch oven bread is the definition of comfort food. It offers the satisfaction of a professional bakery loaf—crispy on the outside, incredibly soft and airy on the inside—without the intimidation of complex techniques. Whether you are a seasoned baker or attempting your first loaf, this recipe bridges the gap between effort and excellence, utilizing the steam-trapping magic of a heavy pot to create the perfect crust.
Quick Facts / Recipe Snapshot
- Total Time: 14–18 hours (mostly inactive rising time)
- Prep Time: 15 minutes
- Bake Time: 45 minutes
- Yield: 1 large loaf (approx. 10–12 slices)
- Difficulty: Beginner / Easy
- Cost Estimate: Under $2.00
- Dietary: Vegetarian, Vegan-friendly, Dairy-Free
- Key Equipment: 4–6 quart Dutch Oven, Parchment Paper
What Is Garlic Herb Dutch Oven Bread?
Dutch oven bread is a style of high-hydration artisan bread baked inside a preheated cast-iron pot. The heavy lid traps steam released from the dough as it bakes, mimicking a professional steam-injection oven. This specific version, the Garlic Herb Dutch oven bread, elevates the classic “boule” by folding in aromatic savory elements. It is characterized by a “shaggy” dough that requires no kneading, relying instead on a long, slow fermentation process to develop gluten structure and deep, complex flavor.
Origins & Inspiration
The modern popularity of the Dutch oven bread method exploded in the mid-2000s, revolutionized by Jim Lahey’s “No-Knead Bread” concept. However, baking bread in covered earthenware or cast iron dates back centuries in European and American frontier cooking. This Garlic Herb variation draws inspiration from rustic Italian country loaves, where fresh herbs like rosemary and thyme are staples. While the technique is a modern American home-baking phenomenon, the flavor profile is timelessly Mediterranean, celebrating the simple union of wheat, water, and aromatics.
Why You’ll Love This Recipe
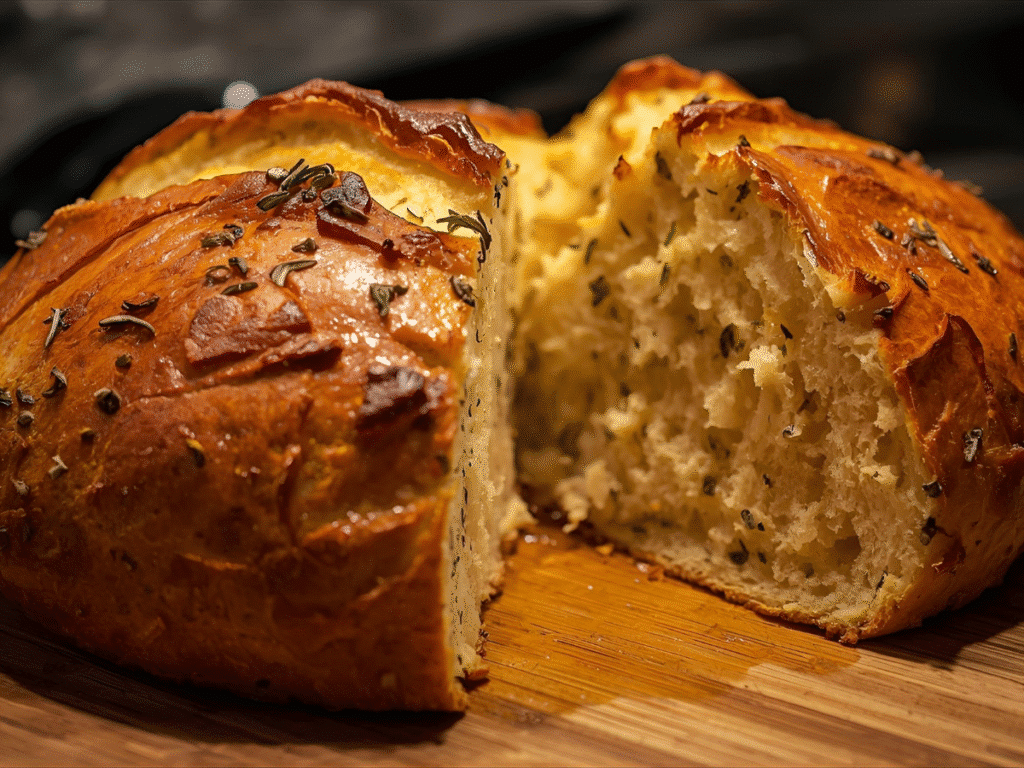
You will fall in love with this Dutch oven bread because it demands almost no hands-on time. The “set it and forget it” dough allows you to mix ingredients in minutes and let time do the heavy lifting. The texture is unparalleled; the contrast between the shatteringly crisp crust and the chewy, moist crumb is something usually found only in expensive artisan loaves. Additionally, it is incredibly versatile—perfect for dipping in olive oil, toasting for bruschetta, or serving alongside a hearty vegetable stew.
Ingredients & Notes
- 3 cups All-Purpose Flour: You can also use bread flour for a chewier texture.
- 1 ½ teaspoons Sea Salt: Essential for flavor development; do not reduce.
- ½ teaspoon Instant Yeast: Or active dry yeast (no need to proof for this long rise).
- 1 ½ cups Warm Water: Roughly 100°F (38°C); not too hot, or it will kill the yeast.
- 1 teaspoon Garlic Powder: Distributes flavor evenly throughout the dough.
- 2 cloves Fresh Garlic: Minced fine; adds pungent pockets of flavor.
- 1 tablespoon Fresh Rosemary: Chopped; dried works too (use 1 tsp).
- 1 teaspoon Dried Thyme: Complements the garlic perfectly.
- Cornmeal (optional): For dusting the bottom of the pot.
Step-by-Step Instructions
- Mix the Dry Ingredients: In a large mixing bowl, whisk together the flour, salt, yeast, garlic powder, dried thyme, and chopped fresh rosemary. Ensure the yeast is well distributed to help the dutch oven bread rise evenly.
- Add Liquid and Garlic: Pour in the warm water and add the minced fresh garlic. Stir with a wooden spoon or silicone spatula just until a sticky, shaggy dough forms. Do not overmix or knead; the dough should look rough.
- The Long Rise: Cover the bowl tightly with plastic wrap or a damp kitchen towel. Let it sit at room temperature for 12 to 18 hours. The dough is ready when it is dotted with bubbles and has doubled in size.
- Preheat the Pot: About 30 minutes before the dough is ready, place your empty Dutch oven (with the lid on) into the oven and preheat to 450°F (230°C). This step is crucial for that signature Dutch oven bread crust.
- Shape the Dough: Turn the sticky dough out onto a generously floured surface. Fold the corners inward a few times to create a ball shape. Place the dough on a large piece of parchment paper.
- Bake Covered: Carefully remove the hot pot from the oven. Lift the parchment paper with the dough and lower it into the pot. Cover with the lid and bake for 30 minutes.
- Bake Uncovered: Remove the lid. The bread should be pale and puffed. Bake for another 10–15 minutes until the crust is deep golden brown and sounds hollow when tapped.
- Cool: Lift the bread out using the parchment edges and let it cool on a wire rack for at least 30 minutes before slicing to prevent a gummy texture.

Tips for Perfect Garlic Herb Dutch Oven Bread Every Time
To ensure your dutch oven bread succeeds, use a kitchen scale to weigh your flour (approx. 360g for 3 cups) as scooping can pack too much flour, leading to a dense loaf. Ensure your water is warm but not scalding. If your kitchen is very cold, place the dough in the oven with just the light on to encourage fermentation. For the crispiest crust, resist the urge to peek during the covered baking phase; trapping that steam is the science behind the success of Dutch oven bread.
Variations, Swaps & Add-Ins
This Dutch oven bread is a blank canvas. Swap the rosemary for dill and add cheddar cubes for a savory cheese bread. For a spicy kick, fold in jalapeño slices and a pinch of red pepper flakes. If you prefer a nutty flavor, replace ½ cup of white flour with whole wheat flour. Seeds like sunflower, sesame, or poppy can be sprinkled on top just before baking for extra texture and visual appeal.
Ingredient Spotlight
Garlic is the star here. While garlic powder provides a consistent background note, fresh minced garlic creates intense flavor pockets that sweeten slightly as they bake inside the loaf. Garlic is not just a flavor enhancer; it has been used for centuries for its medicinal properties. Pairing it with fresh rosemary transforms a simple Dutch oven bread into an aromatic experience that evokes the rustic kitchens of the Mediterranean coast.
Serving Suggestions (Presentation & Plating)
Serve this dutch oven bread warm, sliced thick, and arranged in a linen-lined basket to maintain its warmth. It pairs beautifully with a small dish of high-quality extra virgin olive oil and balsamic vinegar for dipping. For a dinner party, place the whole loaf on a wooden cutting board at the table and slice it fresh for guests, allowing the steam and aroma to enhance the dining experience.
Best Sides to Serve With Garlic Herb Bread
This savory loaf is the ideal companion for soup season. Serve it alongside a creamy tomato basil soup, a hearty vegetable stew, or a classic minestrone. It also works wonderfully with fresh salads, particularly those featuring arugula, goat cheese, and vinaigrettes. The robust garlic flavor of the Dutch oven bread makes it substantial enough to be served with a light pasta dish or a charcuterie board filled with cheeses and olives.
Flavor Pairing & Beverage Match
The herbal notes in this dutch oven bread pair excellently with crisp white wines like Sauvignon Blanc or Pinot Grigio, which cut through the carb-heavy richness. For red wine lovers, a light Pinot Noir complements the earthy rosemary without overpowering the bread. If you prefer non-alcoholic options, a sparkling water with a twist of lemon or an iced herbal tea with lemon balm mirrors the fresh notes in the loaf.
Make-Ahead & Storage Guide
You can prepare the dough for this dutch oven bread up to 24 hours in advance; simply refrigerate it after the initial rise if you aren’t ready to bake. Once baked, store the bread at room temperature in a paper bag or a bread box for up to 2 days to maintain the crust. Avoid plastic bags, which will soften the crust. For longer storage, slice the entire loaf, place parchment between slices, and freeze in a freezer-safe bag for up to 3 months.
Budget & Pantry Strategy
This Dutch oven bread is one of the most economical recipes you can make. Flour, water, salt, and yeast cost pennies per loaf compared to store-bought artisan bread. To save even more, buy flour and yeast in bulk. If you don’t have fresh herbs, dried herbs from your pantry are a perfectly acceptable and budget-friendly substitute. Use leftover stale slices to make homemade croutons or savory bread pudding, ensuring zero waste.
Scaling for a Crowd
If you are hosting a large gathering, this recipe can be doubled easily, though you will need two Dutch ovens to bake them simultaneously or bake them back-to-back. If baking sequentially, keep the second dough in the refrigerator while the first one bakes to prevent it from over-proofing. Alternatively, make two smaller loaves in the same pot if you are careful to leave space between them, though a single large dutch oven bread loaf usually presents better.
Weeknight Workflow Planner
For fresh bread on a Wednesday night, mix the dough on Tuesday evening before bed (takes 5 minutes). Let it rise overnight. On Wednesday evening, preheat the oven as soon as you get home. Shape the dough while the oven heats. Bake while you prepare the rest of the dinner. By the time your main course is ready, you will have fresh, warm Dutch oven bread ready to serve.
Kids & Family Friendly Adaptations
Kids love the process of making Dutch oven bread because it’s messy and tactile. Let them help measure the flour or mix the shaggy dough. If the garlic and herb flavor is too strong for picky eaters, you can reduce the quantities or make a plain version for them. The soft inside is perfect for toddlers, while the crust serves as a great teether for older babies handling solids (always supervise).
Troubleshooting & Fixes
If your dutch oven bread comes out flat, your yeast may have been old, or the water was too hot. Always check expiration dates. If the crust is too thick or burnt, reduce the oven temperature by 25°F or move the rack higher in the oven. If the dough is impossible to handle, it may be too hydrated; simply use more flour on your hands and work surface during the shaping phase. A gummy interior usually means it wasn’t baked long enough or was sliced while too hot.
Cultural or Seasonal Context
Bread baking is a universal symbol of hospitality. While this Dutch oven bread uses general Western techniques, the flavor profile fits perfectly into Autumn and Winter menus when comfort food is paramount. It is also a wonderful gift for neighbors during holidays (excluding Christmas specifics) or as a housewarming present, symbolizing sustenance and warmth in a new home.
FAQs
- Can I use a different pot? Yes, any heavy, oven-safe pot with a tight lid (like stainless steel or ceramic) works, though cast iron yields the best dutch oven bread crust.
- Do I have to use parchment paper? It is highly recommended to prevent sticking and make transferring the hot dough safer, but you can generously cornmeal the pot bottom instead.
- Why is my dough so sticky? This high hydration is normal and necessary for the airy crumb of a good Dutch oven bread. Do not add too much flour during mixing.
- Can I speed up the rise? You can use slightly warmer water and place the bowl in a warm spot to reduce the rise time to 4–6 hours, but the flavor development will be less intense.
Love this recipe? Discover even more!
Explore my Pinterest boards for a world of delicious recipes, fresh ideas, and inspiring flavors. Click here and start pinning your next favorite dish! ➜https://www.pinterest.com/ElitesRecipes/
PrintThe Best Garlic Herb Dutch Oven Bread
A beginner-friendly, no-knead Dutch oven bread recipe infused with roasted garlic and fresh herbs. This artisan loaf features a golden, crackling crust and a soft, airy interior.
- Prep Time: 15 minutes
- Cook Time: 45 minutes
- Total Time: 18 hours
- Yield: 1 loaf
- Category: Bread
- Method: Dutch Oven
- Cuisine: American / Artisan
- Diet: Vegan
Ingredients
3 cups all-purpose flour (or bread flour)
1 1/2 tsp sea salt
1/2 tsp instant yeast
1 1/2 cups warm water (approx 100°F)
2 cloves garlic, minced
1 tsp garlic powder
1 tbsp fresh rosemary, chopped
1 tsp dried thyme
Cornmeal (optional, for dusting)
Instructions
1. Whisk flour, salt, yeast, garlic powder, and herbs in a large bowl.
2. Stir in warm water and minced garlic until a shaggy dough forms.
3. Cover and let rise at room temperature for 12–18 hours.
4. Preheat oven to 450°F (230°C) with the Dutch oven inside.
5. Turn dough onto a floured surface and shape into a ball.
6. Place dough on parchment paper.
7. Carefully place parchment and dough into the hot Dutch oven.
8. Cover and bake for 30 minutes.
9. Remove lid and bake for another 10–15 minutes until golden brown.
10. Cool on a wire rack for 30 minutes before slicing.
Notes
Ensure your yeast is fresh for the best rise.
Do not slice the bread while it is hot, or the texture may become gummy.
Store in a paper bag for up to 2 days or freeze for up to 3 months.